E-Bike Manual Evinci Wattwheels Meloyelo Kapiti Wellington Nelson New Zealand

E-Bike Manuals

E-Bike Manuals

Here is a link to all of our E-Bike Manuals:

Evinci Models Manuals

Evinci Tui, Robin & Falcon https://evinci.nz/Downloads/Evinci_TD_Manual.pdf

Evinci Tui, Robin & Falcon https://evinci.nz/Downloads/C300S_Display_Advanced.pdf

Evinci Tui +, Falcon +  https://evinci.nz/Downloads/Evinci_TDplus_Manual.pdf

Evinci Tui + Falcon + Robin + https://evinci.nz/Downloads/C300U_Display_Advanced.pdf

Kea https://evinci.nz/Downloads/evinci_KEA_Manual.pdf

Infinity Hub  https://evinci.nz/Downloads/evinci_infinity_HD_Manual.pdf

Infinity MD  https://evinci.nz/Downloads/evinci_infinity_MD_Manual.pdf

Volto Tui, Robin & Falcon https://evinci.nz/docs/Volto_TD_Manual.pdf


Wattwheels E-Bike Models

Here is the link for the manual to all the Wattwheels Models

https://www.wattwheels.co.nz/download-manuals/

Bighorn LS & S

Bighorn Urban

Scout XT

Scout LS & S

City LS Trike

XT Trike

Frey 600


MeloYelo Models

Here is the link for all the Manuals and Owner Care for MeloYelo models

https://meloyelo.nz/owner-documentation/

Ascent

Traverse

Super Lite

Tranzit

Town n Trail

Townee

Roam


You've Purchased an E-Bike? Kapiti Wellington New Zealand

You’ve Purchased an E-Bike?

You’ve Purchased an E-Bike?

What am I supposed to do once You’ve Purchased an E-Bike? Well…. If you’re reading this post then odds are that you’ve bought an E-Bike. Congratulations! Now you’re wondering what to do in order to preserve this investment into a cleaner, greener way of getting around. Here, We’re going to cover all of the basic things you should be doing with your E-Bike once you’ve made your purchase. This ranges from registering it with your supplier and insider tips that will help make your bike last longer. With that being said. Let’s get straight into it.

Registering Your E-Bike

Most E-Bike Suppliers in New Zealand tend to get you to register your E-Bike after purchased so you can activate your warranty, keep track of your servicing history and/or give you access to exclusive deals and promotions. This is incredibly helpful for keeping repair costs down if something does happen (As rare as this may be). And on top of that it is so much easier to do than you think. Here’s the simplest way to do this.

Things you will need to register your E-Bike:

The Serial Number, a valid E-Mail Address.
  1. Search for your suppliers website online
  2. Look under the sub-headings of the website and select either “Register” or “Warranty”
  3. Follow the websites instructions
  4. Done

Now I’d like to say that these instructions aren’t an exact science, but just a rough guide. If you’re still having issues with registering your E-Bike then there could be one of the following reasons that explains why.

  • Your E-Bike supplier doesn’t need you to register it.
  • If it is a second-hand E-Bike, It doesn’t need registering (or it’s already been registered by the previous owner).
  • The Serial Number is incorrect.

Insider Tips

There’s a couple tricks of the trade that some stores might forget to tell you on the day of purchase. So we’ll just put them here so you know how to keep your bike in tip top shape.

Tip 1: Keep your battery charged. Yet every 3 Months try and ride your bike until your battery is flat.

This needs a little bit of explaining, but it will make sense. E-Bike Batteries are Lithium-Ion based which means they like to be in a charged state. But you should drain your battery ASAP after your purchase. This is because your battery has a BMS (Battery Management System). Due to your battery being brand new, it hasn’t been properly used yet, meaning we need to calibrate the BMS by simply draining its charge and recharging the battery back to 100% . This will prolong the life of your battery by making sure the BMS is calibrated every 3 months. So in other words… Ride your bike at least once every 3 Months so you can drain the battery to recharge it fully. This helps to prolong the life of your battery. 

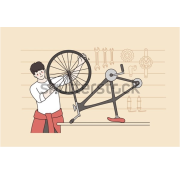
Tip 2: Plan a Servicing schedule and when you want to service your bike.

Your E-Bike (Just like a car) needs regular maintenance and servicing otherwise it won’t perform as it should after enough time. Luckily our suppliers give you lengthy warranties on all parts. And we’ve made up a full servicing plan to ensure that your bike stays healthy throughout your bikes warranty. Here’s how often to get your bike serviced.

Your 1st service should be between 200-500km mark (Some bikes come with a free service before 500km, count this as a 1st service as your bike is still very new and normally just serves as an inspection, however it’s good for spotting manufacturer errors that aren’t as obvious). Your second service should be around the 1000km mark. On the second service it’s easy to point out how quickly or slowly your consumable parts (Brake pads etc.) are wearing out. From that point onwards you want to get your bike serviced every 1000kms. This way, your bike will stay in top condition and your warranties will stay valid. As they are subject to servicing and can affect any claims. We also have servicing packages that make your ebike cheaper to maintain in the long run

Servicing Plans we offer to Our Customers:

Evinci, Wattwheels and Merida

1st Service – $50 (Valid between 200-500km odo)

2nd Service – $50 (Valid until 1000km)

3rd Service – $100 (Recommended at 2000km)

4th Service – $100 (Recommended at 3000km)

5th Service – $50 (Valid until 4000km)


MeloYelo

1st Service – Free (Valid between 200-500km odo)

2nd, 3rd and 4th Service – $100 Each (Recommended at 1000km, 2000km and 3000km)

5th Service – $50 ( Valid until 4000km)


EBike Maintenance Basic's

EBike Maintenance Basic’s

EBike Maintenance Basic’s

EBike Maintenance Basic’s

  • Keep your bike clean
  • Keep the drivetrain well lubricated
  • Keep the tyres properly inflated. Our recommended pressures for most riders bikes are around 40psi for around town and 30psi if riding off road trails.
  • Regularly check for loose bolts, spokes and broken parts.
  • Keep the battery 80% charged and store it in a cool, dry place. Do not store a flat battery and check battery every 3 months
  • Additionally Avoid riding in the rain when possible.


How to Wash an E-Bike

In order to give your E-Bike the longest life possible, you certainly can take some simple steps to maintain and clean it yourself.

The things you’ll need are:

  • Water
  • Bucket
  • Soap / Bike cleaner
  • Sponge and Brush
  • Chain Lube

Another handy tip: Leave your battery in your bike when rinsing and washing. Just don’t turn your bike on. Because this prevents water getting into your battery plate/connections which is one of the most sensitive areas of your E-Bike. Also Your batteries are designed to be water resistant incase you get caught out in the rain regardless. As long as it’s sealed. You’ll have no issues 🙂


1. Rinsing your E-bike

Basically Fill a bucket with water and specific bike cleaner. Now rinse your bike just using water to rinse any excess dirt off.
DO: Use a garden hose to rinse your bike. If you can, try and use the mist spray setting on your hose. This helps avoid getting water into sensitive areas.
DO NOT: Use a pressure hose or a jet power washer as these could cause dirt and debris to move into sensitive areas. As a result using a high powered hose could wash away grease which is intended to prevent water and dirt from penetrating into the bearings.

Sensitive areas you should avoid rinsing and washing are your display and battery/ battery plate. Just wipe over these with a damp cloth.

2. Apply degreaser

Above all use bike-specific degreaser on the entire drivetrain (cassette, derailleurs, chain, chainrings) and allow the solution to soak in for at least 5 minutes while you clean the rest of your bike.
DO NOT: Spray degreaser onto brake calipers / brake pads (or rotors if you have disc brakes). If degreaser finds its way to these areas, it can cause contamination and squeaky brakes!
Whilst you’re waiting for the degreaser to dry you can go on cleaning the rest of the bike.

 3Washing your bike

After the degreaser has dried you can apply soap and water. Scrub everything on the bike and remember to continue to occasionally dip your sponges / brushes into your soapy water as you scrub. Another key point is to hold a sponge on your chain as you move the pedals around is a great way to clean off any excess grease. When youʼre satisfied everything is clean, use the garden hose again to rinse off the entire bike.

4. Drying your bike carefully

Another handy trick to remove excess water is to gently bounce it on the tires. If it is a sunny day, you certainly could sit the bike out in the sun to dry. Also use a soft towel to wipe the bike dry. Additionally ensure you pay careful attention to bolts, the drivetrain and any other area that may hold water.

5. Lube and greasing the bike

Additionally use a good chain lube to keep the chain lubricated after cleaning. This ensures it isnʼt left dry. And certainly use a wet lube in the winter and dry lube in the summer.

And always remember to keep the tyres properly inflated.